Mexican pan dulce
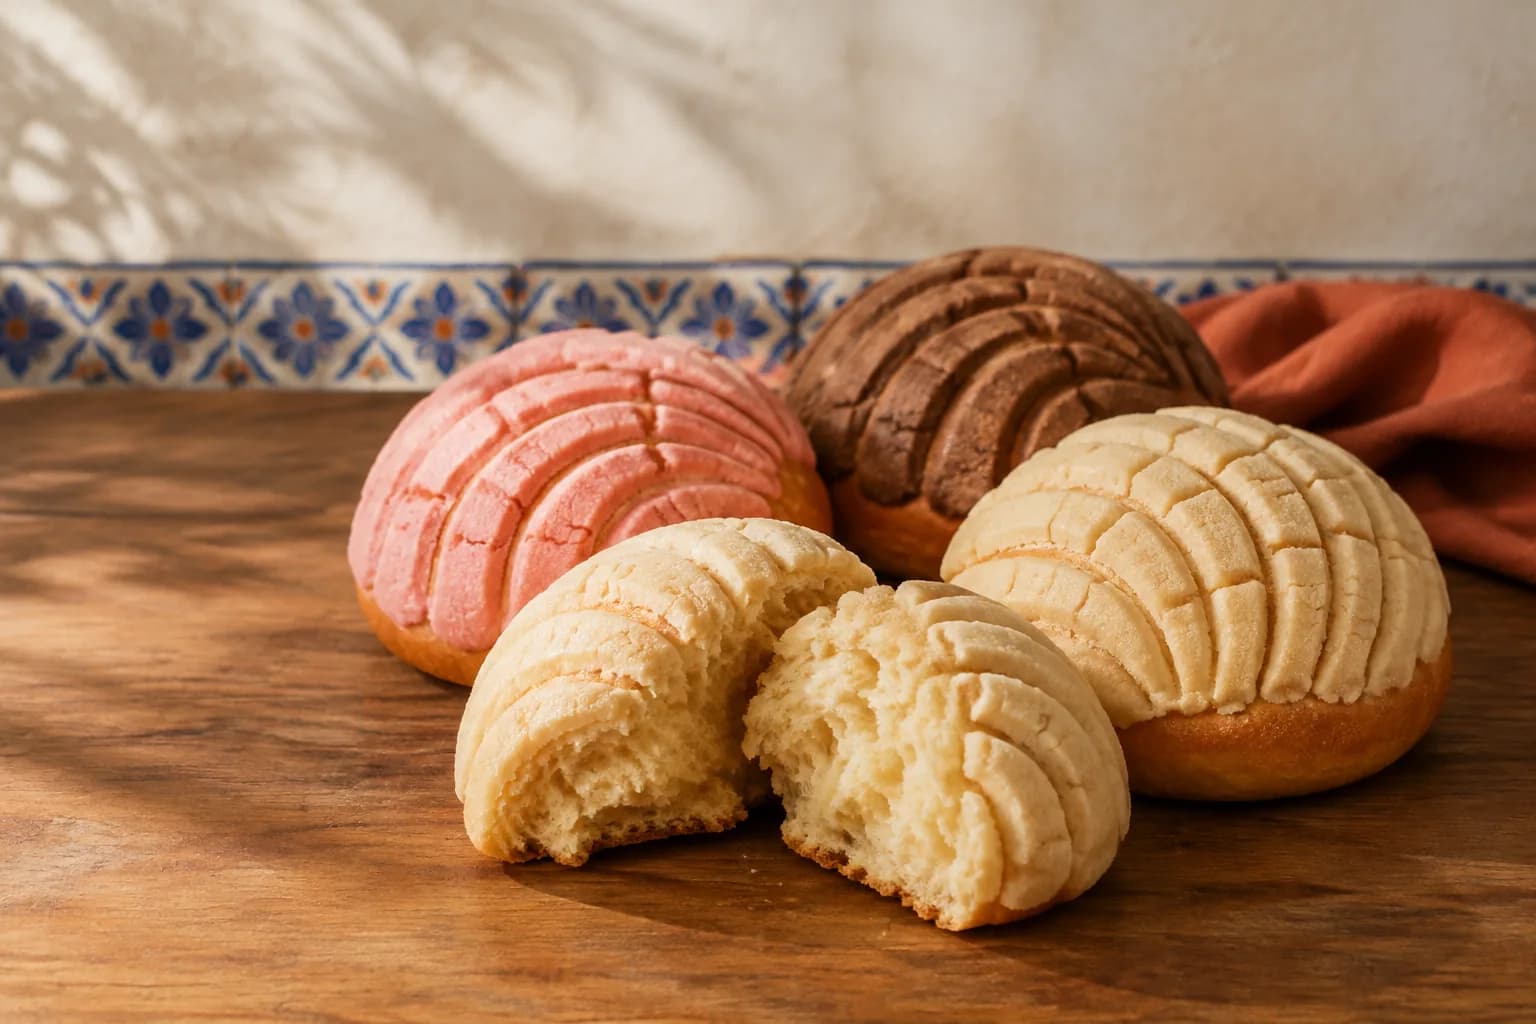
Conchas
Tender yeast bread beneath a crisp, patterned shell.
A concha sends two doughs into the oven together: a soft, lightly sweet yeast dough and a thin cookie crust marked with its familiar shell pattern. This formula calculates the egg and topping separately.
The formula
Ten conchas
Make 739.3 g bread dough and 260.7 g topping: 1,000 g in total for ten buns. The egg belongs in the bread dough; make the topping separately using the second ingredient block. Prepare two parchment-lined baking sheets. The baked buns weigh a little less because moisture evaporates.Active: about 45 min · Rising: 105–210 min · Baking: 18–22 min per sheet · Cooling: about 30 min.
- Strong bread flour
- 100%362 g
- Whole milk
- 40%145 g
- Salt
- 1.6%5.8 g
- Instant yeast
- 1.5%5.4 g
- Unsalted butter for the dough
- 18%65 g
- Sugar for the dough
- 18%65 g
- Egg for the dough
- 25%91 g
Weights are rounded for weighing; their sum may differ slightly from the calculated total. Small additions stay in grams.
Shell topping for ten buns
Mix only the three ingredients below for the topping. The butter and sugar in the first block are separate portions for the bread dough.- Wheat flour for the topping
- 34.8%91 g
- Confectioners' sugar for the topping
- 34.8%91 g
- Butter or vegetable shortening for the topping
- 30.5%80 g
Weights are rounded for weighing; their sum may differ slightly from the calculated total. Small additions stay in grams.
Two textures that must meet at exactly the right moment
The bread needs enough strength to rise beneath a topping that should remain short and crumbly. Slack dough or dry topping erases the shell pattern.Whole milk
Deliberately moderate because the egg adds more moisture and richness to the dough.
Egg
Adds color, structure and tenderness without turning the bread into heavy brioche.
Bread dough
Per piece before topping: large enough for a light pan-dulce dome.
Shell topping
A thin cookie layer that opens visibly during proofing and bakes crisp.
Why a concha is not just a bun with sugar on top
Concha is Spanish for shell. The name refers to the curved lines pressed into the topping before final proof. The soft bread expands, the cookie layer opens along those grooves and the pattern becomes more pronounced on its own.
Conchas belong to Mexico's broad pan dulce tradition: sweet bread bought from panaderías for breakfast, a snack, coffee or hot chocolate. European baking techniques influenced Mexican sweet bread, but the concha acquired its own form, use and cultural meaning in Mexico.
Its precise inventor and birthday are not reliably documented, so this page does not manufacture a tidy origin story. What does define a concha is clear: enriched yeast dough, a separate crumbly topping and a shell pattern applied by hand.
A soft bun, a thin cap and five curved lines
These quantities make ten conchas. If you scale the recipe, adjust the quantities in the steps too. Add the topping before the final proof. Watch the dough's volume as it rises; a cool kitchen needs more time.Weigh and mix the bread dough
Beat two eggs and weigh out 90.6 g / 3.2 oz without shells; do not simply add two whole eggs. Mix with 144.9 g / 5.1 oz whole milk at about 20–24 °C, 362.2 g / 12.8 oz strong bread flour, 65.2 g / 2.3 oz sugar, 5.4 g instant yeast and 5.8 g salt. Mix on low speed for 3–5 minutes until no dry flour remains. Keep the 65.2 g / 2.3 oz dough butter and all topping ingredients aside for now.
Knead in the butter
Add 65.2 g / 2.3 oz soft, not melted, butter in small portions. Then knead on low to medium speed for about 10–15 minutes; hand kneading often takes longer. Gently stretch a small sample into a thin translucent membrane. If it tears straight away, knead for another 2 minutes and retest. The dough may stay slightly tacky; avoid repeatedly adding flour.
Develop the first rise
Place the dough in a lightly greased bowl, cover and mark its starting height. Leave at 24–26 °C for about 60–120 minutes, until its volume increases by roughly 75–100%. It should look airy and still domed, without collapsing. Make the topping while you wait; sugar and butter can slow fermentation.
Make a pliable shell topping
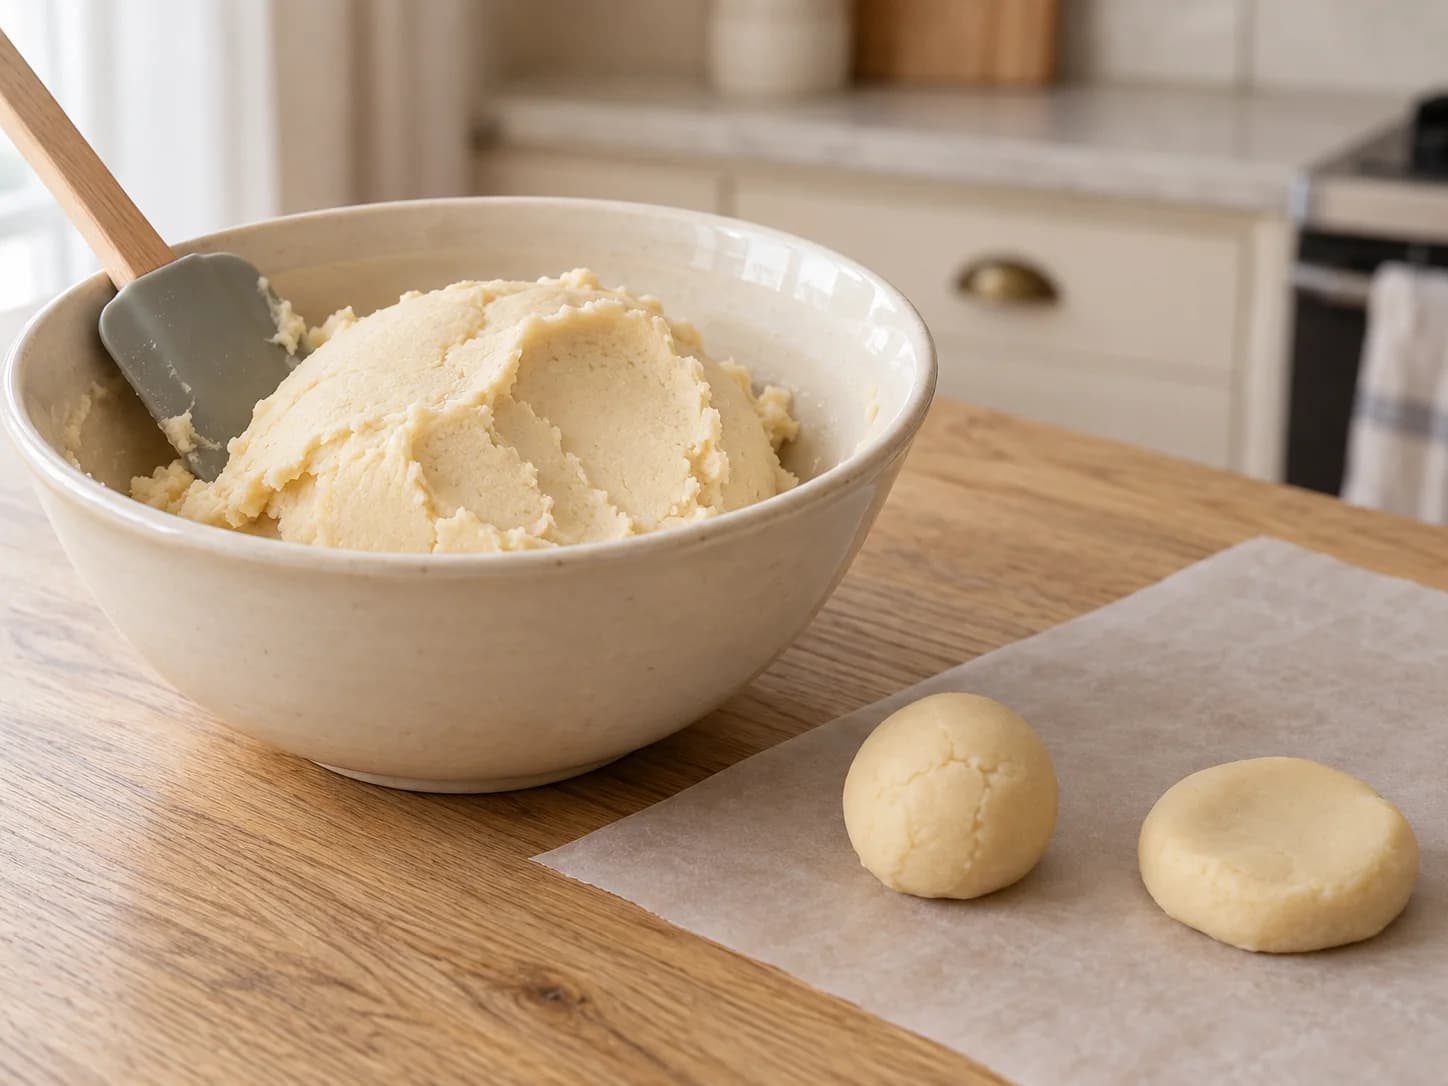
Mix 79.5 g / 2.8 oz soft butter or vegetable shortening with 90.6 g / 3.2 oz sifted confectioners' sugar until smooth. Briefly mix in 90.6 g / 3.2 oz plain flour to form an even paste. Do not beat until fluffy or add egg. A small piece should flatten into a disc without cracking or spreading. If sticky and slack, chill for 10 minutes; if hard from the fridge, let it soften first.
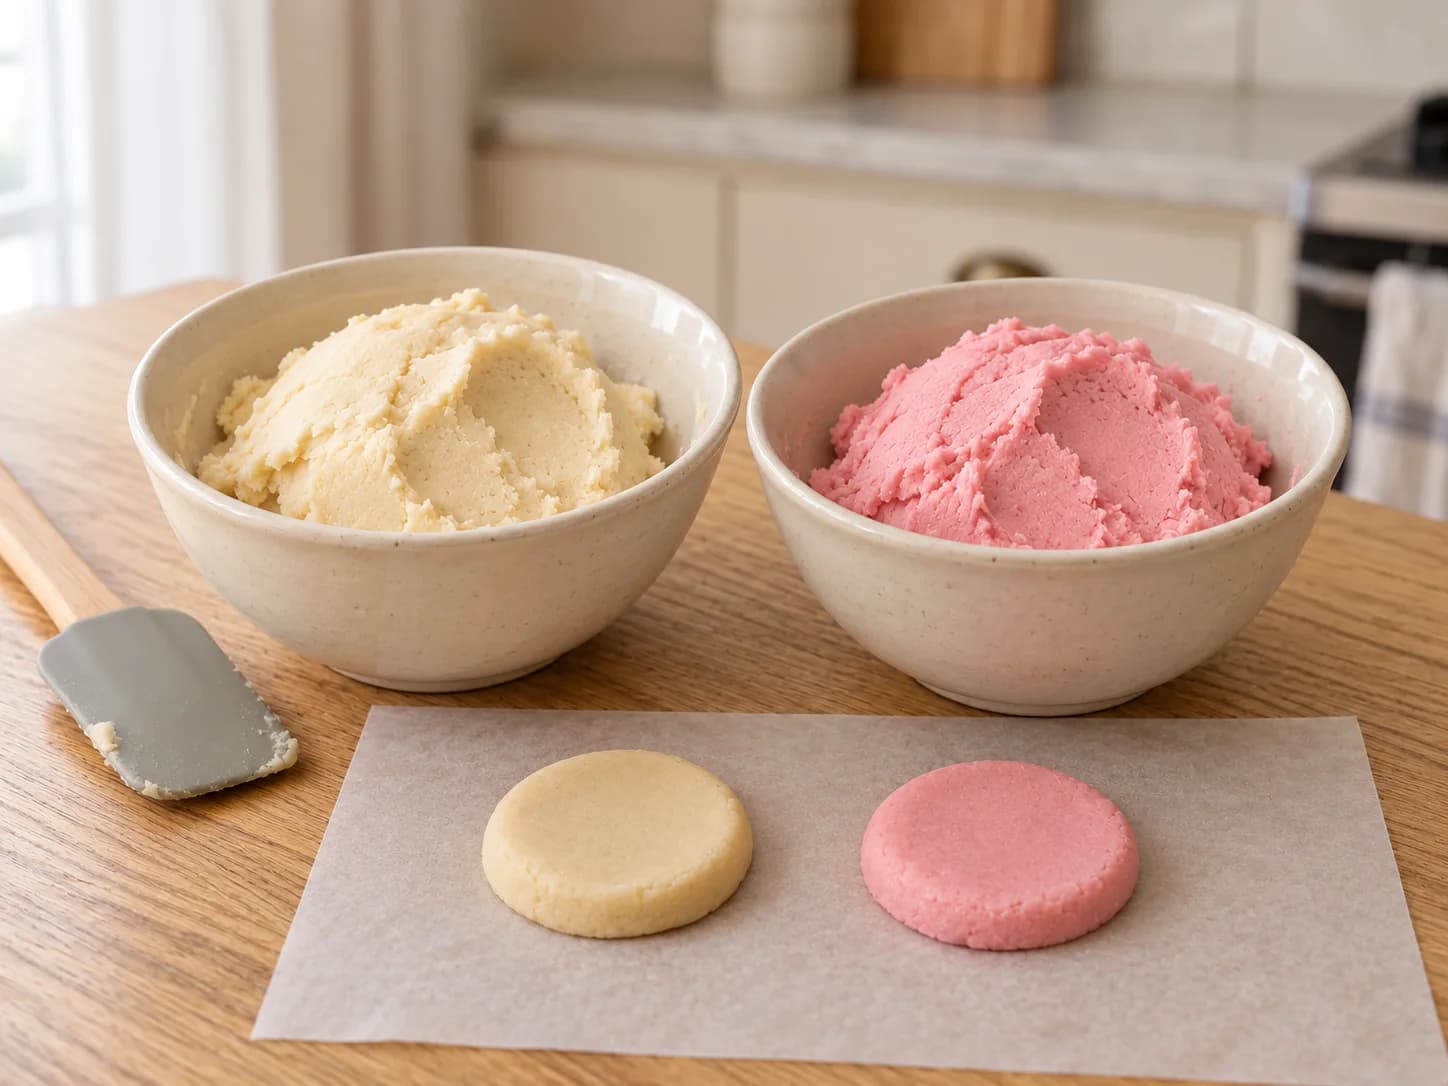
First make the plain base. The paste holds its shape and flattens without spreading on its own.
Color part of the topping (optional)
For five plain and five pink conchas, divide the paste into two equal portions of about 130 g / 4.6 oz. Leave one plain; knead a little baking-suitable pink gel food coloring into the other. Start with a toothpick-tip amount and add a little more if needed until the color is even. Later, shape five caps from each half. Use the same method for yellow or other colors; see the FAQs for cocoa. Prefer all plain? Skip the coloring and continue with dividing the bread dough.
The same topping in two colors: plain and pink with gel food coloring. Knead until evenly colored before shaping the caps.
Divide and round the buns
Gently press large gas bubbles out of the risen dough and weigh ten equal portions of about 74 g / 2.6 oz. Fold the edges into the center, turn over and round each piece with a cupped hand. Place seam-side down on parchment, five per baking sheet with at least 7 cm between the balls. Use little bench flour so the topping can stick.
Cover with thin topping discs
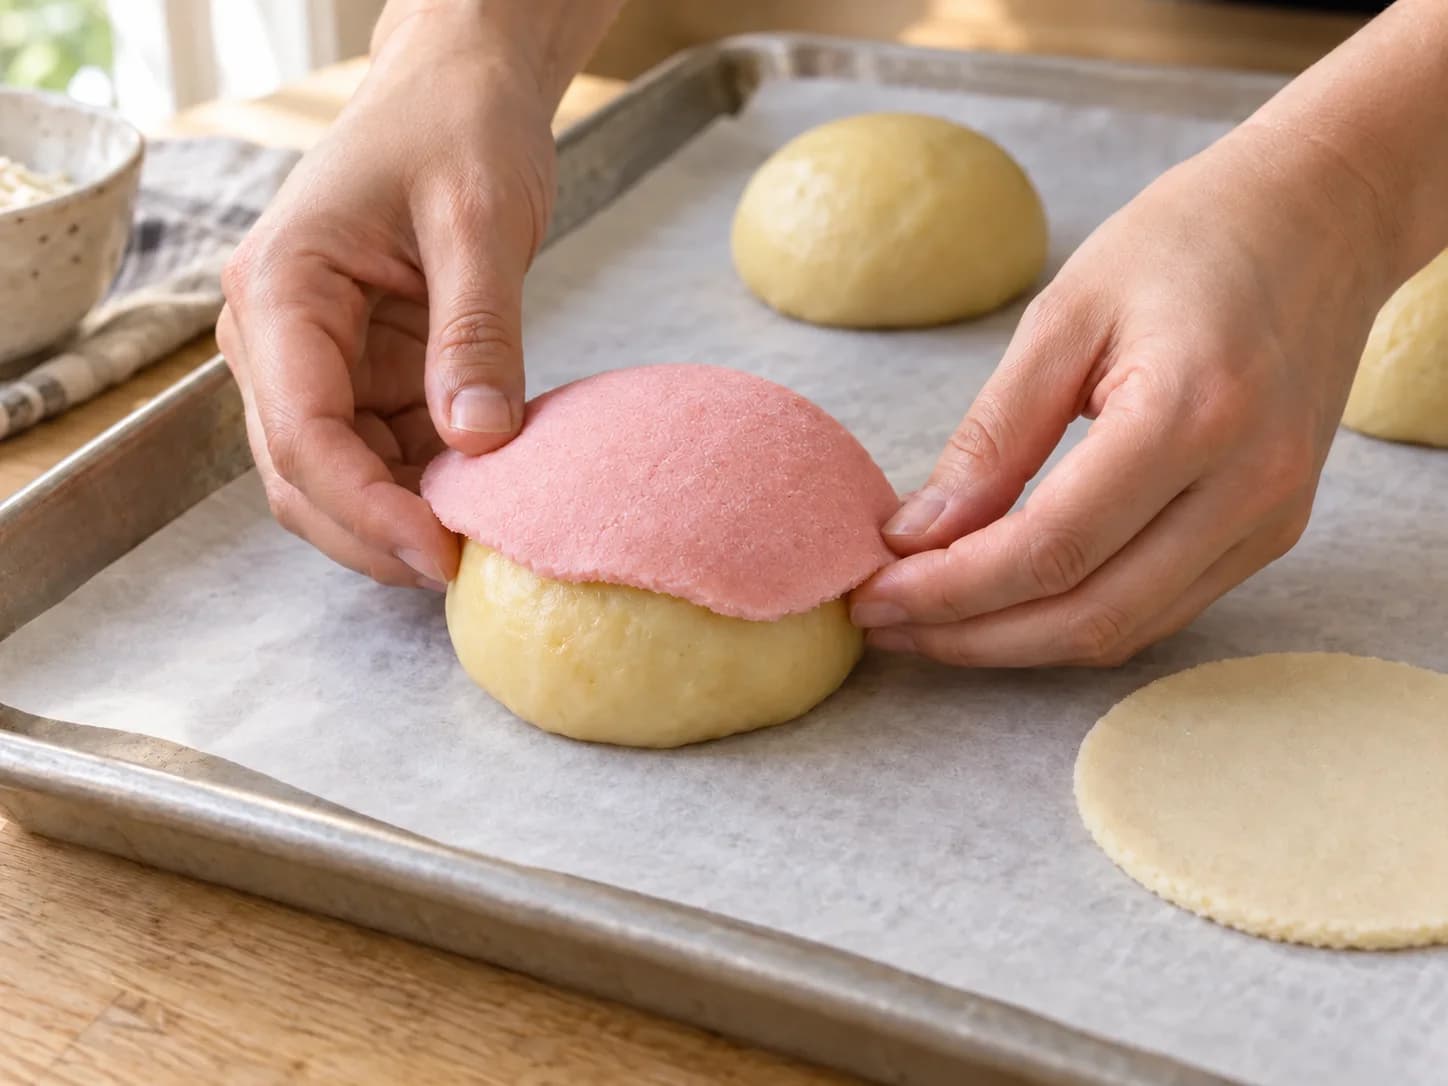
Divide the topping into ten portions of about 26 g / 0.9 oz. If using two colors, divide each half into five caps. Press each between two pieces of parchment into a circle about 8 cm across and 3–4 mm thick. Peel off one sheet, invert the disc onto a dough ball and carefully remove the second sheet. Gently press it onto the dome and upper sides; it need not reach the base. If the dough surface feels dry, first rub on a very thin film of extra soft butter.
Gently press down the edge. The topping follows the dome and covers the upper part of the sides.
Score only the topping
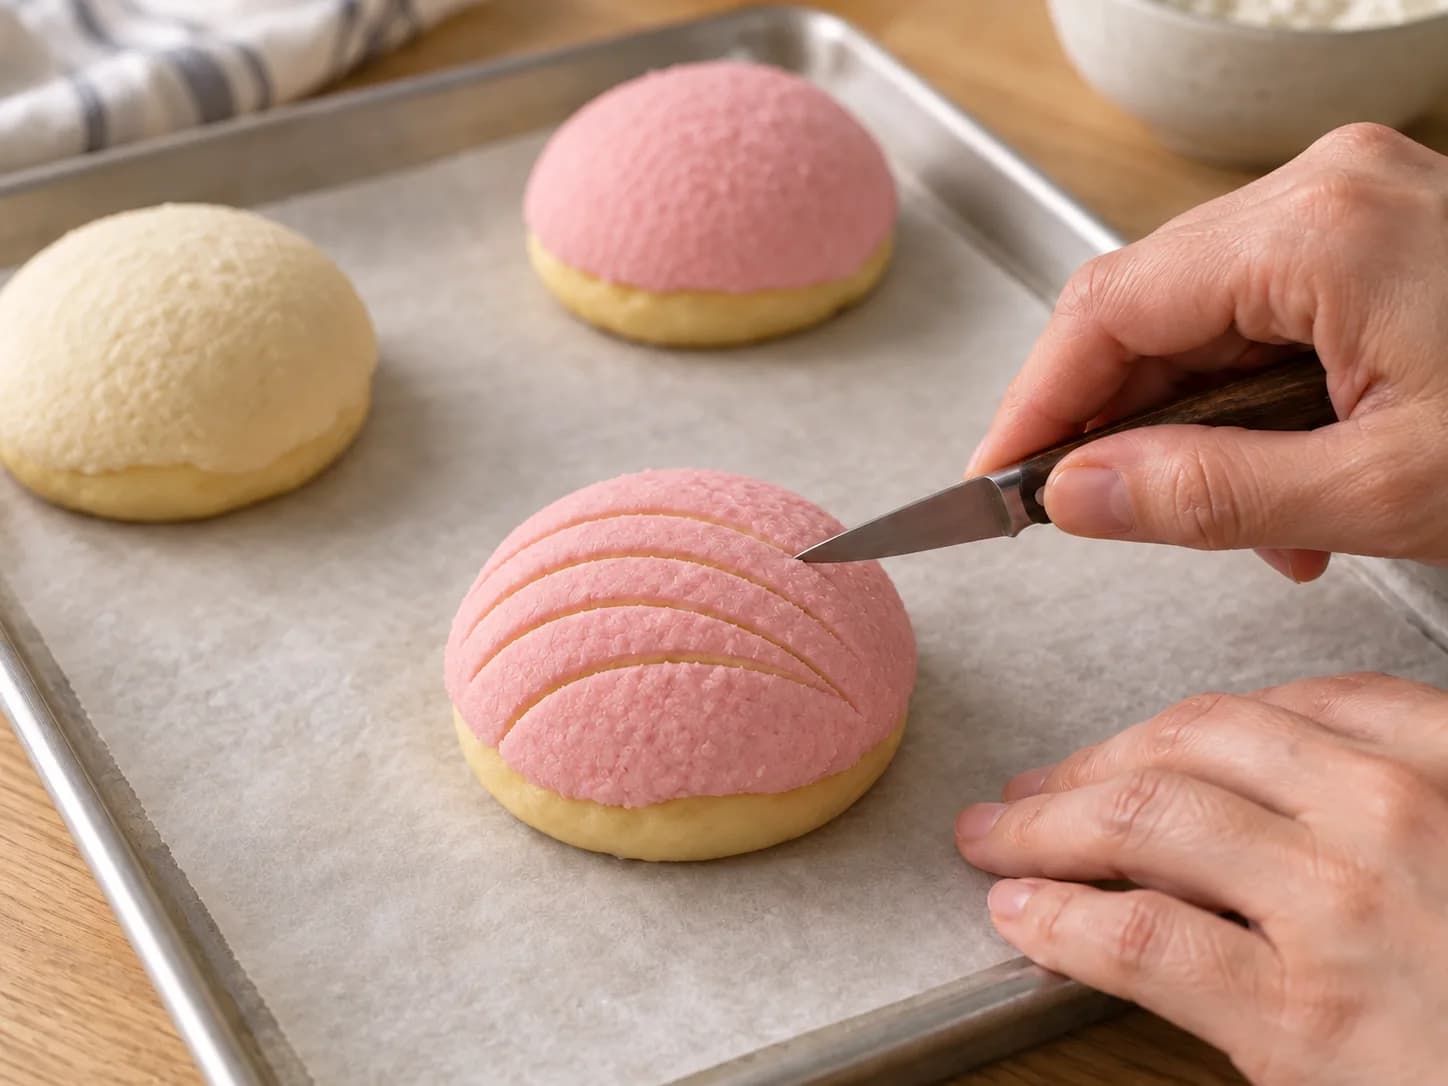
Use a concha cutter or the tip of a small sharp knife. Trace five curved parallel lines, all bending in the same direction and about 1 cm apart. Cut through the 3–4 mm topping, but leave the bread dough beneath intact. The lines are narrow now and widen naturally as the buns rise. Wipe the blade between cuts if the topping sticks.
Cut through the thin cookie layer while leaving the soft bread dough beneath intact.
Give the buns their final proof
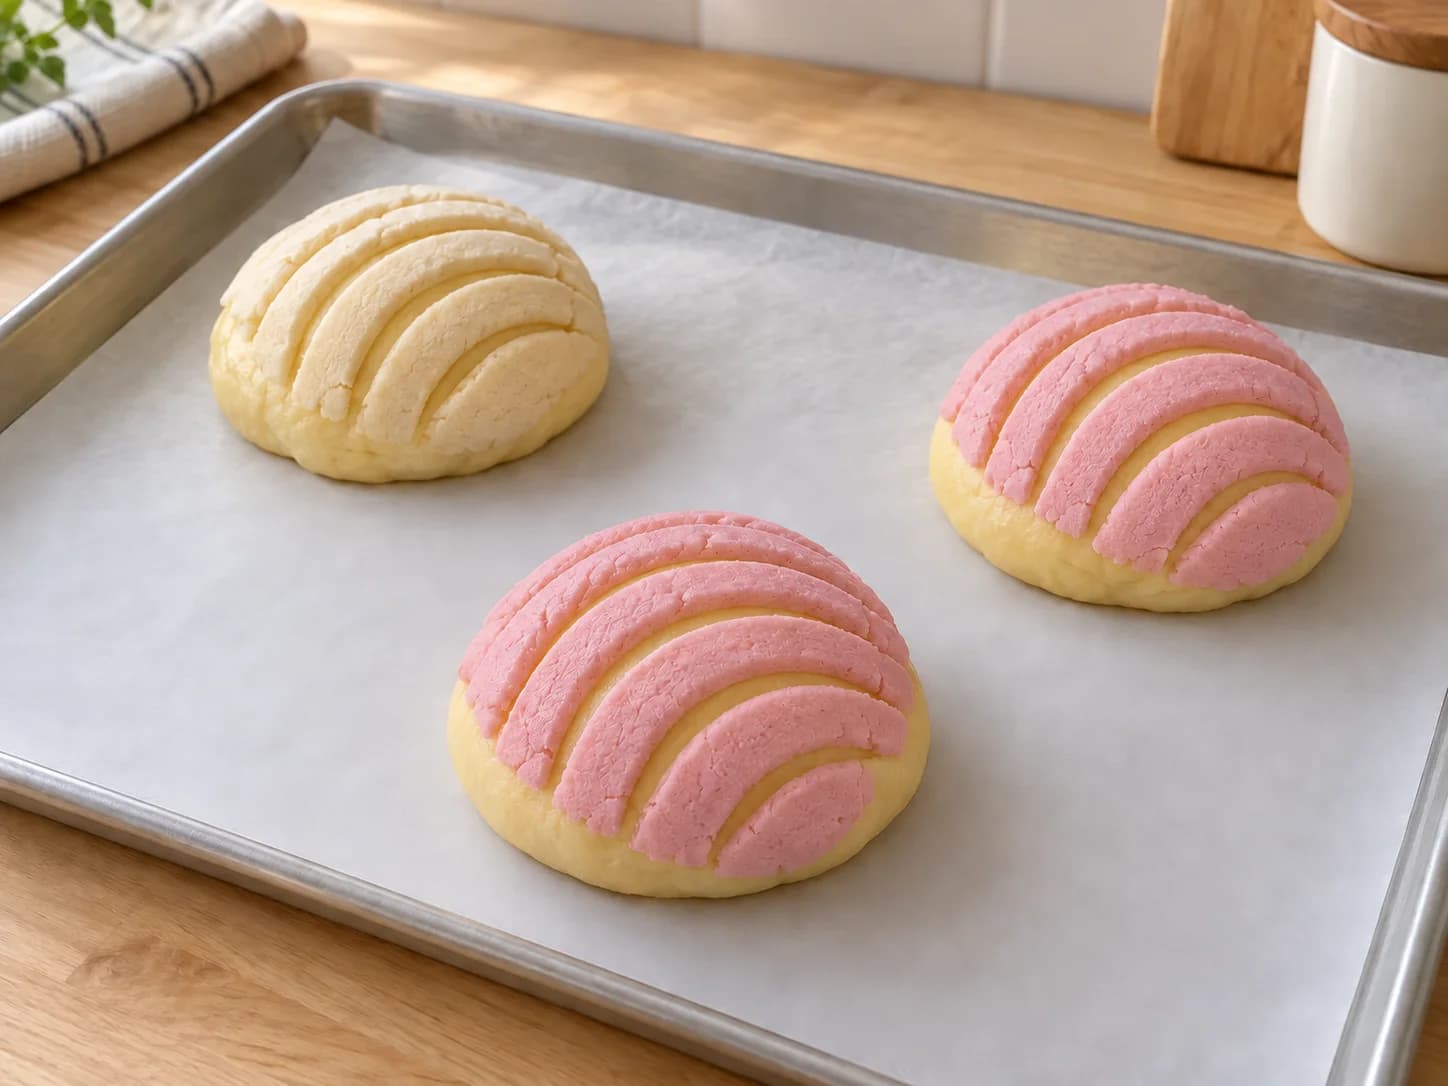
Cover loosely with lightly greased film without flattening the caps. Proof at 24–26 °C for about 45–90 minutes. The buns become noticeably larger and softer and the grooves open. A gentle press on an uncovered side should spring back slowly. Preheat to 180 °C conventional or 165 °C fan in good time. Bake one sheet at a time; refrigerate the second, covered, once it is sufficiently proofed too.
The grooves have widened and the buns are fuller. They are still unbaked here.
Bake light golden and cool
Remove the film and bake one sheet on the middle rack for about 18–22 minutes. The bread edges and bases turn light golden; the plain topping stays pale and colored topping need not brown. The cookie layer becomes dry and crumbly as it cools. A thermometer can confirm about 93 °C in the bread's center. Bake the second sheet the same way. Leave on the baking sheet for 5 minutes, then cool on a wire rack for at least 25 minutes before pulling one apart.
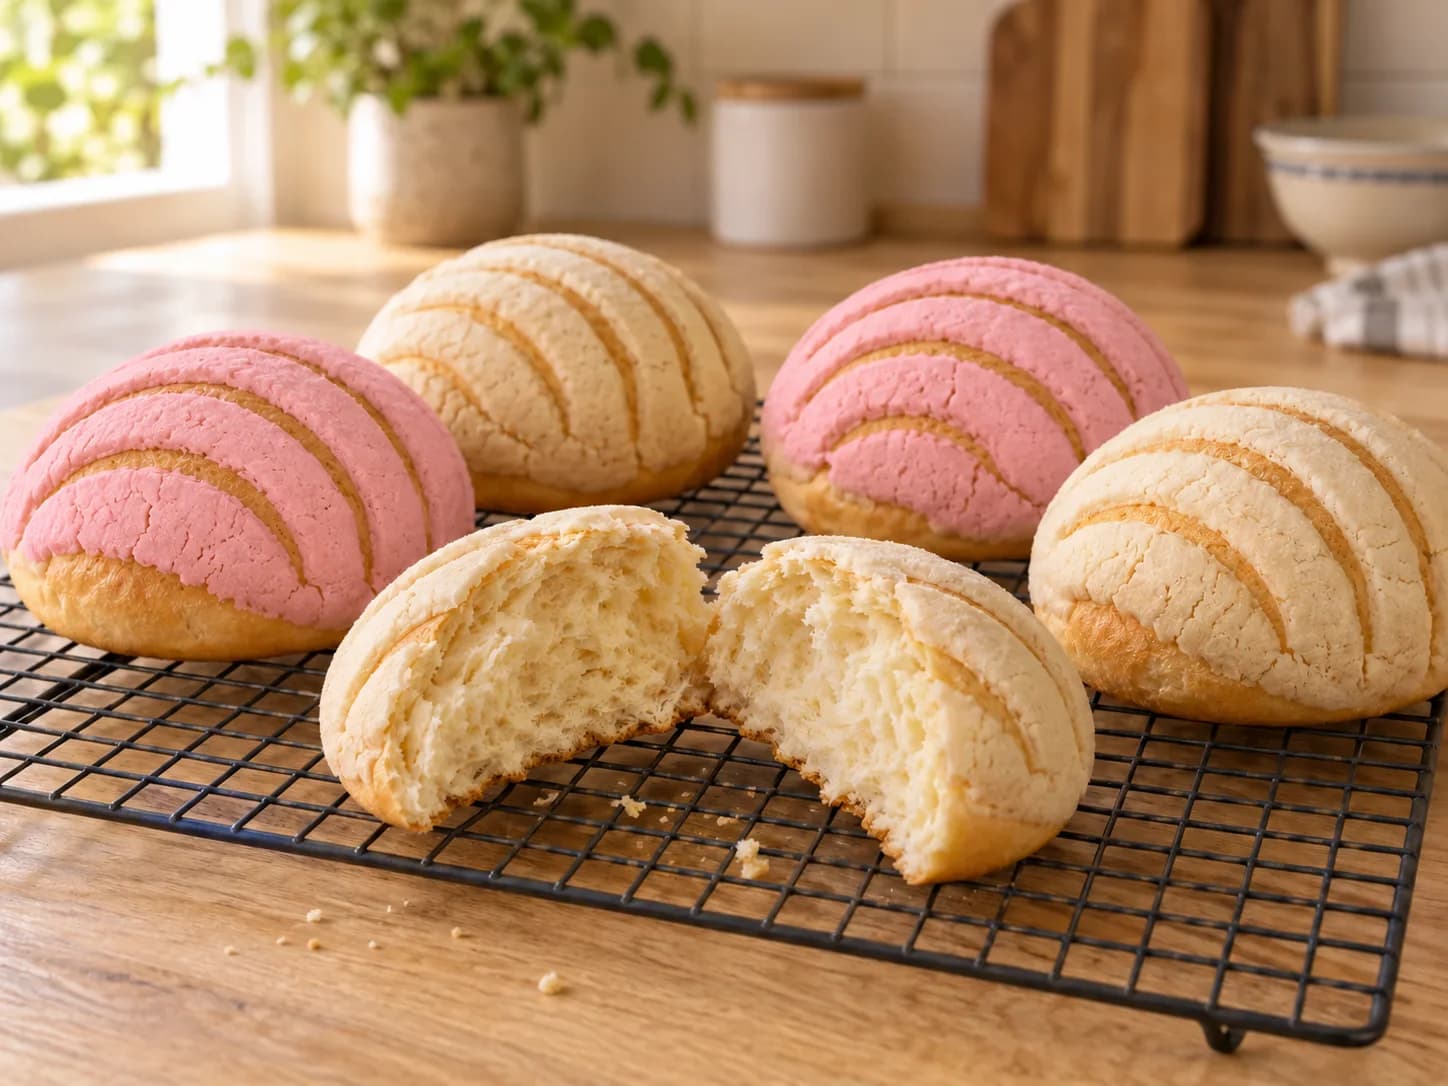
Plain and pink after baking. Only the thin cookie topping is colored; the bread underneath stays light golden with a soft crumb.
Problems with the shell topping and shape
The topping falls off before baking
The paste was too dry or the disc was not pressed around the dome. Knead in a few drops of milk or a little soft butter and let it wrap slightly down the sides.
The pattern disappears during proofing
The topping was too warm or soft. Chill the portions briefly and press the lines clearly without damaging the bread dough.
The conchas turn dry
Bake only until the bread edge is golden, not until the pale topping browns. Also check whether unnecessary extra flour was added during kneading.
The buns remain low and heavy
Develop the enriched dough further, check the yeast and allow more final proof. Sugar and fat slow fermentation.
Frequently asked questions
Can I replace butter with vegetable shortening?
Yes. Shortening often gives sharper topping lines and a shorter bite; butter has more flavor but softens sooner. Butter is preferable in the bread dough.
How do I make chocolate conchas?
For ten chocolate caps, use 82.6 g topping flour and 8 g unsweetened cocoa instead of 90.6 g topping flour. Keep the sugar and butter unchanged. Sift the cocoa and mix briefly; the paste should remain pliable.
Do I need a special concha cutter?
No. Use the tip of a small sharp knife to trace five parallel curved lines. Cut only through the thin topping and leave the bread dough intact.
Can the dough rest overnight in the fridge?
Yes. Let it start fermenting briefly after kneading, refrigerate covered and shape the next day. Expect a longer final proof while the enriched dough warms up.
Are conchas the same as Japanese melonpan?
No. Both combine soft bread with a cookie-like top. Conchas often have curved shell lines, while melonpan usually has a diamond pattern. Their doughs and toppings also vary by recipe.